6. Approvals Application
TABLE OF CONTENTS
1. The Role of Approval in Business Management
1.1. What is Approval?
Approval is the process in which a proposal, request, or document needs to be confirmed and authorized by a person with authority before implementation. In other words, an approval process ensures that the right person (a manager or authorized delegate) will formally review and ratify a decision or action. This concept plays a crucial role in corporate governance, as organizations focus on transparency, compliance, and efficiency in operations. By subjecting decisions to a multi-level approval process, businesses can minimize errors and ensure consistency, as each step is cross-checked against policies and standards before passing.
1.2. The Role of the Approval Process
In corporate governance, the approval process is considered a vital part of the internal control system and corporate governance. It ensures that all business activities align with the organization's policies, regulations, and strategic goals. For example, requiring approval for expenses or projects helps businesses enforce budget control and comply with legal regulations. Furthermore, the approval process creates a clear audit trail of who approved what and when, thereby enhancing transparency and accountability in decision-making. Overall, a well-designed approval system balances control (ensuring work is done correctly) and flexibility (not excessively slowing down business operations).
Applying approval processes too broadly or frequently is a warning sign that current business processes are not optimized. Businesses need to review and improve internal management systems, standardize, and automate to achieve higher efficiency.
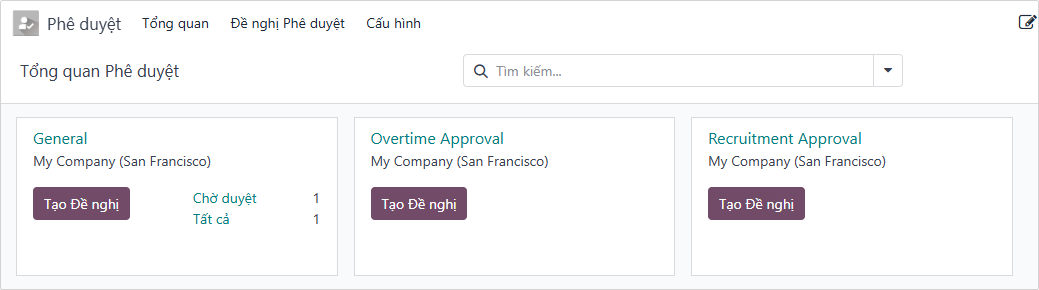
2. Approvals Application in Odoo
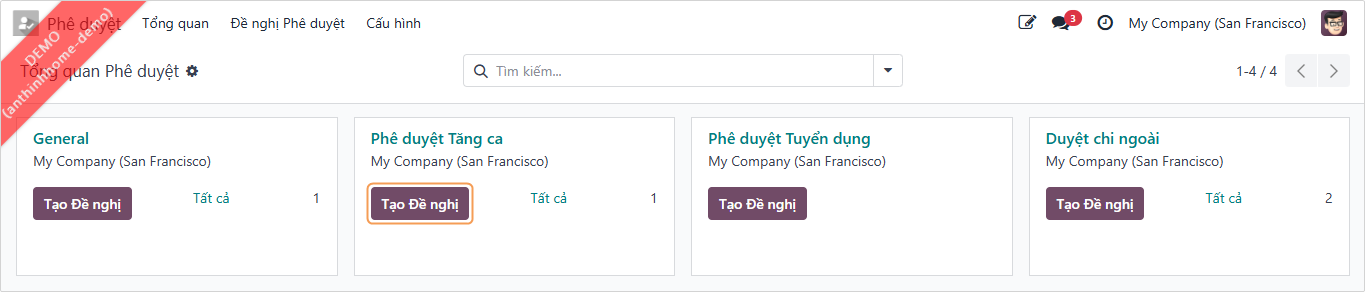
In Odoo, the approval system is implemented through a combination of built-in features and additional modules to support multi-step review processes. Odoo provides an Approvals module – This is a general framework allowing the creation and management of diverse approval requests. Administrators can define Approval Types (e.g., Business Trip Request, Payment Approval, Contract Approval...) and configure who needs to approve each type. Users can then send approval requests, and the system will route them through stages (e.g., Draft, To Submit, Submitted, Approved, Done) as designated approvers take action. The Approvals management screen in Odoo allows managers to view all pending requests and approve them quickly, facilitating a paperless and transparent process.
After you install the Approvals application, the system will automatically install the Employees application to support the features of Approvals.
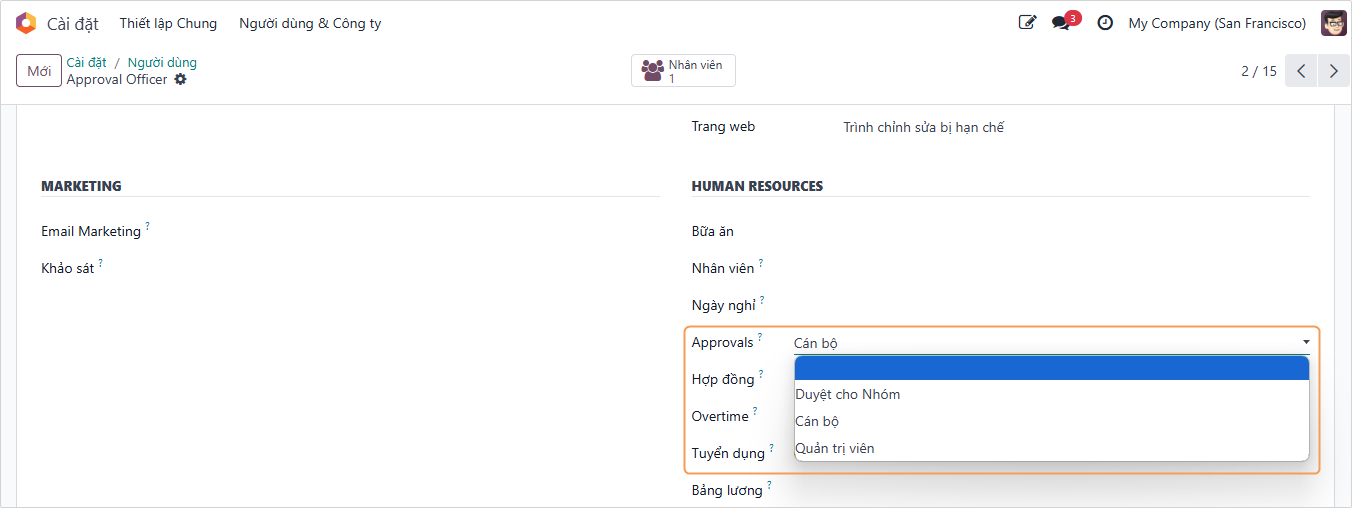
2.1. Setting Approval Access Rights
To set approval rights for users, go to Settings > Users & Companies > Users and click on the user you want to configure.

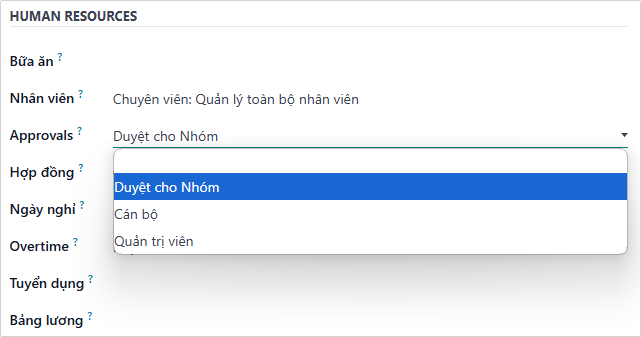
In the Approvals field, select the Approval right you want to assign to this user.
-
Empty (None): The user can create and edit Approval Requests in Draft state, cancel and reset to draft for requests that have been submitted, view requests they created or requests related to them, and receive notifications when their request is Approved / Refused / Canceled.
-
Team Approver: The user has all the rights above and additional rights to approve requests created by employees they directly manage. View requests created by themselves and direct subordinates, receive notifications when direct subordinates Submit requests. Approve / Refuse / Cancel / Reset to draft requests created by direct subordinates.
In the request's Approval Type, you must configure the employee's manager as one of the approvers.
-
Officer: The user has the right to create and view all requests. Receive notifications when requests arise of a type they are authorized to approve, and can Approve / Refuse / Cancel those requests.
-
Administrator: The user has all the rights of an Officer, plus the right to configure Approval Types.
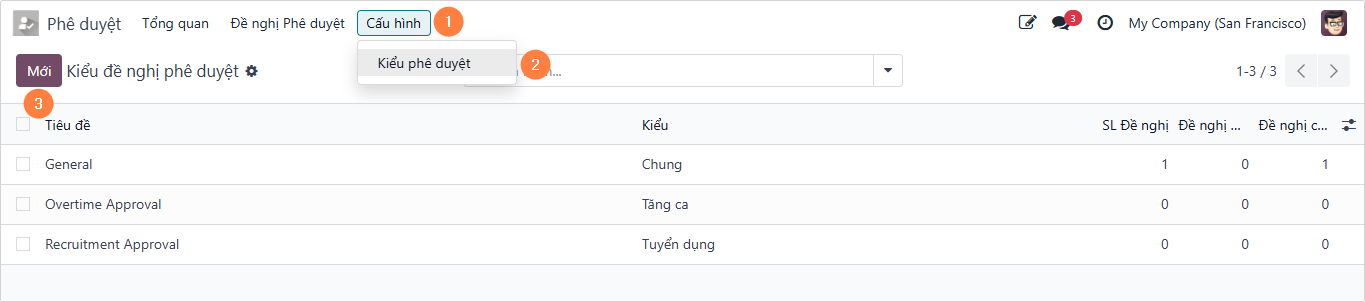
2.2. Managing Approval Types
2.2.1. Creating an Approval Type
To create an approval request type, navigate to the Approvals app ➔ Configuration ➔ Approval Types ➔ click the New button to proceed with creating an Approval Request Type.
Administrator rights in approval settings are required for the user allowed to create Approval Types.
Fill in the necessary information:
-
Enter the name of the approval request type.
-
Type: The type helps categorize and obtain statistics on approval requests. Different types will have different information suitable for each request category.
-
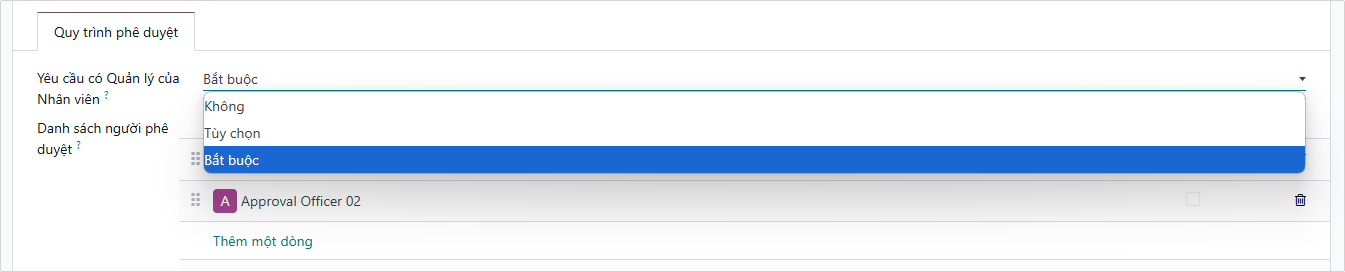
Employee's Manager: Controls how the employee's manager participates in the approval process for requests of this type.
- No: The employee's manager will not participate in the approval process.
- Optional: The employee's manager will be one of the approvers but is not a required approver. The request can still be approved when all required approvers have approved and the minimum approval count condition is met.
- Required: The Employee's Manager is one of the required approvers. This means if the manager does not approve, the request will move to the refused status.
The manager must be assigned Team Approver rights on the Approvals app and be set as the direct manager of the request creator to be an approver for this approval type.
-
Approvers: Identify the approvers for requests of this type (Excluding the employee's manager).
-
Sequential Approval: If activated, approvers will be prompted to approve requests of this type sequentially from top to bottom.
-
Estimated Days: The total number of days required for approvers to approve requests of this type. In other words, this is the number of days used to calculate the approval deadline for requests of this type.
-
Minimum Approval: The minimum number of approvals for a request of this type. If the creator has a required manager:
- Required: Minimum number of approvers plus one.
- None or Optional: The number of approvers remains unchanged.
NoteThe minimum number of approvals must be greater than or equal to the total number of required approvers.
-
Description: Describe the content requiring approval. After filling in the necessary information, click Save to save the approval request type.
2.2.2. Setting up Approval Levels
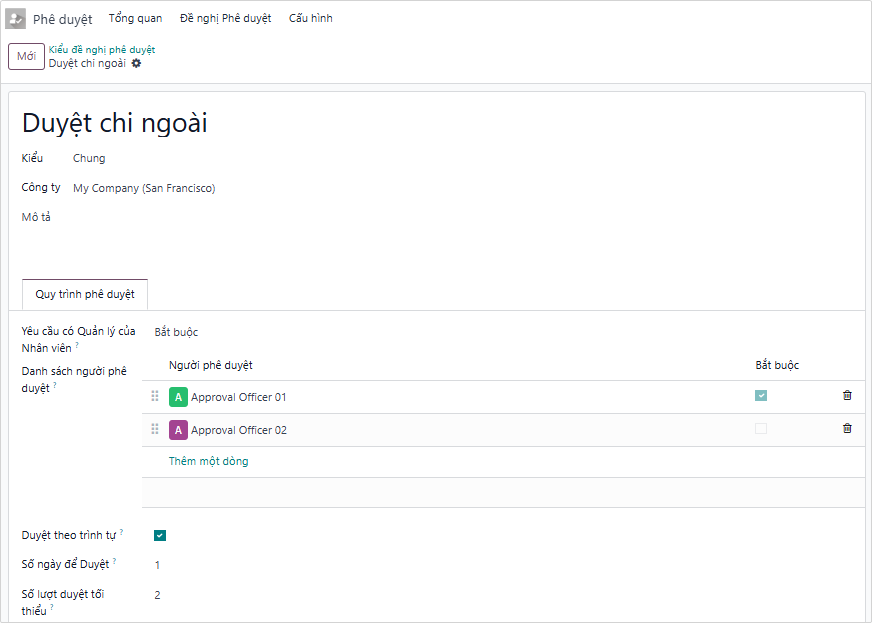
- Step 1: Navigate to the Approvals app. From the main menu, click on: Approvals ➔ Configuration ➔ Approval Types. Select the approval type you want to set up approval levels for.
- Step 2: In the Approval Process section of the approval type configuration form, find the "Employee's Manager" field, and select one of the options:
- Required: The employee's direct manager is the first approver (required).
- Optional: The direct manager can approve but is not required.
- Empty (No): If you leave it empty, the first person to approve will be the person at the top of the approver list.
- Step 3: Add subsequent approval levels
Scroll down to the Approvers list, click Add a line to add the next approver (Level 2, Level 3,...).
Arrange the order of approval levels from top to bottom. For example:- Level 1: Employee's Direct Manager (if selected in step 2).
- Level 2: Approval Officer 01.
- Level 3: Approval Officer 02 (Final Approval).

- Step 4: Configure required approvers
In the Approvers list, check the "Required" box next to the approver's name. When this is checked:- If the approver approves the request: The request will move to the next level or status.
- If the approver refuses the request: The request immediately moves to "Refused" status and cannot be approved further.

- Step 5: Configure sequential approval
- Check the "Sequential Approval" box so the approval process happens in order from top to bottom (Subordinates approve first, then superiors).
- If this box is not checked, all approvers will receive notifications at the same time to approve in parallel.
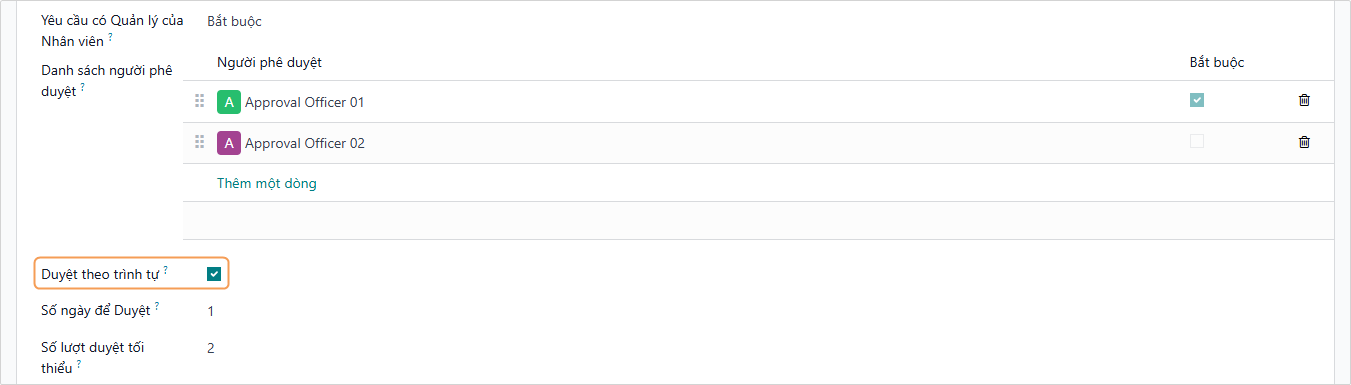
- Step 6: Set time limits and minimum approvals
Set "Estimated Days":
- Enter the number of days allowed for approvers to process the request.
- Deadline calculation formula:
Deadline = Request Creation Date + Estimated Days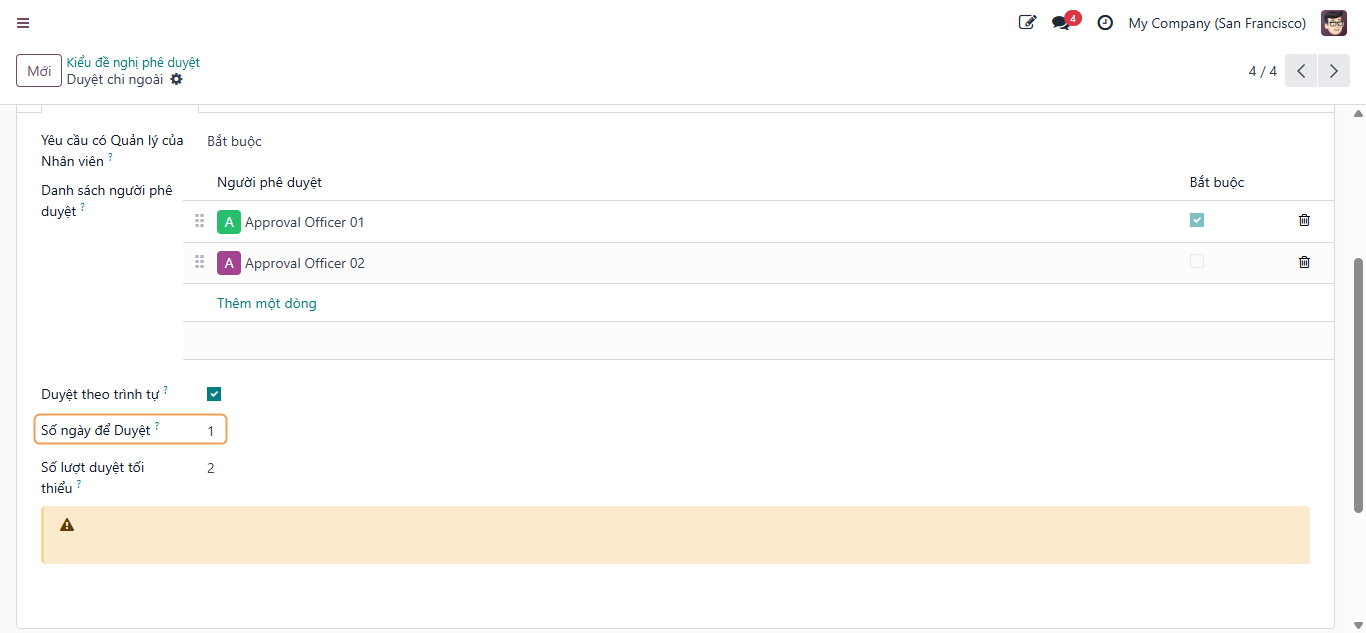
Set "Minimum Approval":
- Enter the minimum number of approvals required for the request to be accepted.
- This value needs to ensure:
Total Required Approvers ≤ Minimum Approvals ≤ Total Approvers Needed
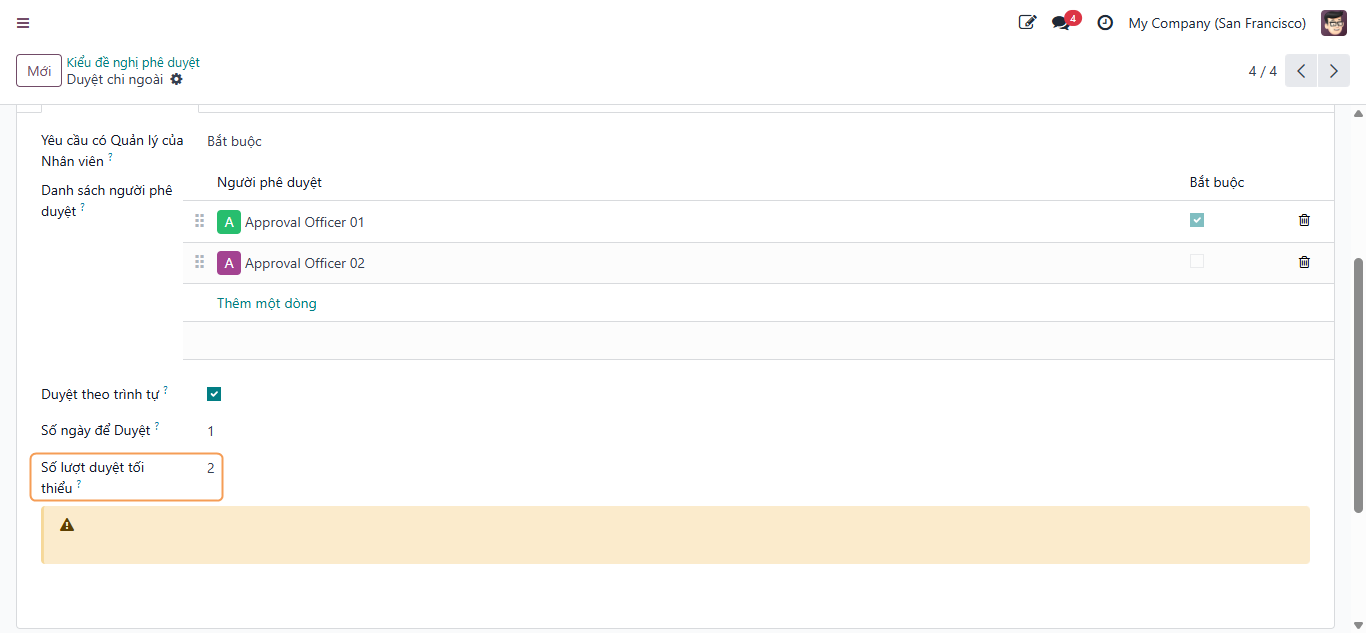
Example:
-
Total approvers: 4 people
-
Required approvals: 2 people
-
Thus, you need to enter "Minimum Approval" from 2 to 4.
-
Step 7: Complete configuration
- After completing all the setup steps above, click the Save button to save the configuration.
- From now on, requests belonging to the approval type you just set up will follow the approval levels and conditions you just installed.
- Ensure all approvers are added to the correct user accounts in Odoo.
- Double-check the configuration to ensure that conditions and sequences operate correctly according to business requirements.
3. Managing Approval Requests
3.1. Creating an Approval Request
To create a new Approval Request, navigate to the Approvals App, select an Approval Type, and click the New Request button.
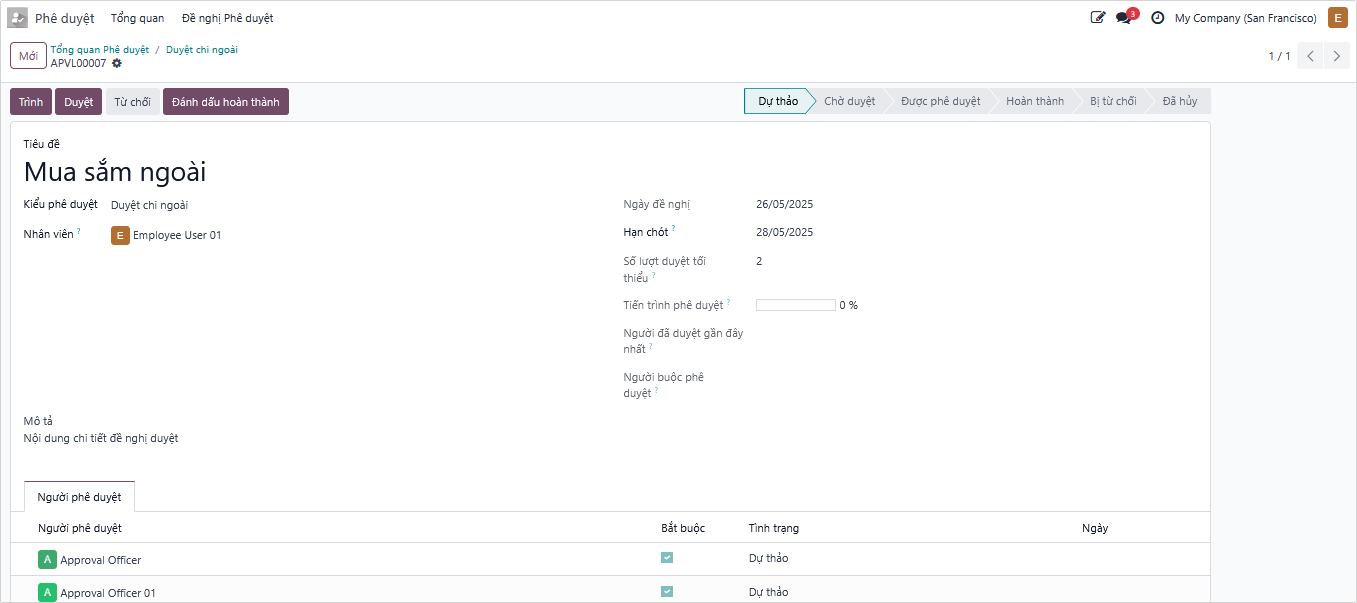
In the detailed form for Creating an Approval Request, fill in the following necessary information:
- Subject: The title of the request should be concise but full of information; naming conventions including specific prefixes/suffixes can be used for easy searching later.
- Approval Type: Allows selection from a list of approval types (General, Purchase Request, Repair Request...).
- Request Owner: The employee responsible for this approval request. The system defaults to the person creating the Approval Request.
- Category: Select the department of the employee.
- Date: The system automatically fills in the actual date the request is created.
- Deadline: The approval deadline for this request.
- Minimum Approval: The minimum number of approvals for this request.
- Approval Status: The approval progress of the request calculated in percentage.
- Approver Status: The approval status of the user account currently viewing this request within this Approval Request. If the user is not in the approver list, the status will be Not Involved.
- Last Approved By: The person who most recently approved this approval request.
- Force Approved By: The person who moved this request to the approved status without waiting for other approvers or overruling other proposals.
- Description: A brief description of this approval request.
- Approvers Tab: The system will suggest approvers already set up on the Approval Type.
- Required Column: If an approver marked as Required refuses the Approval Request, that request will immediately move to the Refused status without needing other approvers to review.
The system will automatically adjust information regarding approvers, required approvers, approval sequence, estimated days, and minimum approvals of the Approval Request based on the information already set up on the Approval Type. See how to set up approval types in Managing Approval Types.
After filling in full information, the user clicks Save to save the request in Draft state, then clicks the Submit button to move the request to Submitted state. At this point, approvers will receive a notification.
After the request creator clicks Submit, the system will send notifications to all approvers, or each approver by level. (This will depend on the settings on the Approval Type). Simultaneously, the system will also generate an Approve action and assign it to the direct manager of the creator or the approver.

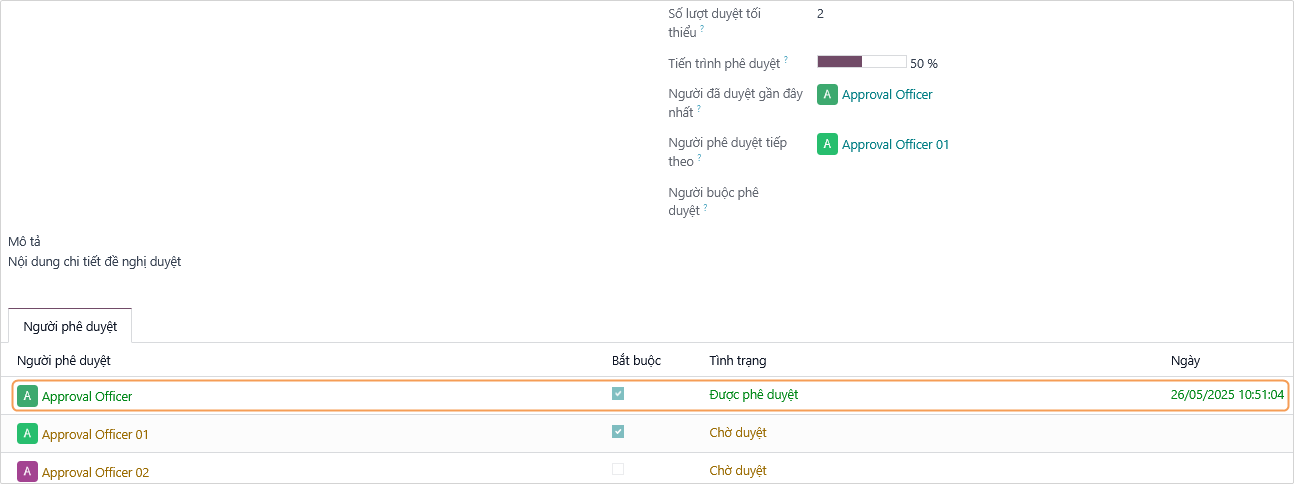
In the example, the approval request has 3 main approval levels. Since it is a sequential approval type, it will be approved from level 1 to level 3:
- Level 1: The employee's direct manager is a required approver.
- Level 2: The required approver is Approval Officer 01.
- Level 3: The non-required approver is Approval Officer 02.

There are 2 cases that occur:
- Case 1: The manager Approves the request > The approval request will be forwarded to the next approver.
- Case 2: The manager Refuses the request > The approval request will immediately move to the Refused status without moving to subsequent approval levels.
3.2. Approving Requests
3.2.1. Approver performs approval
After the manager clicks Approve on the request, the system will continue to generate an activity and send a notification to the level 2 approver.
After the level 2 approver approves, the system will continue to generate an activity and send a notification to the level 3 approver. However, since the level 3 approver is not required, this approval request is considered Approved, and the Approval Progress is now at 100%.
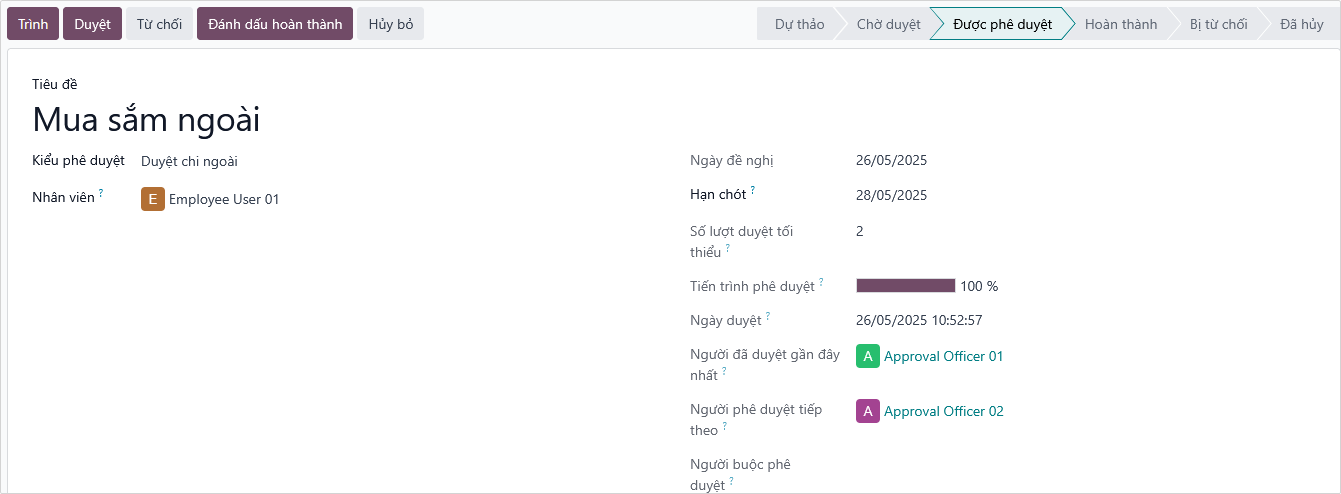
Suppose the level 3 approver (a non-required approver but part of the process) chooses Refuse, that Approval Request still remains in the Approved status.
When the level 3 approver clicks Mark as Done, the Approval Request will change status to Done.
3.2.2. Force Approval
In an approval process, at any time, regardless of the approval opinion of the previous person (Even when the request is refused), approval can be forced by clicking the Force Approval button on the request.
- Only those with Administrator rights of the Approvals app can force approval.
- The Force Approval button only appears when the request is in the Submitted/To Approve state.

3.2.3. Editing Approval Requests
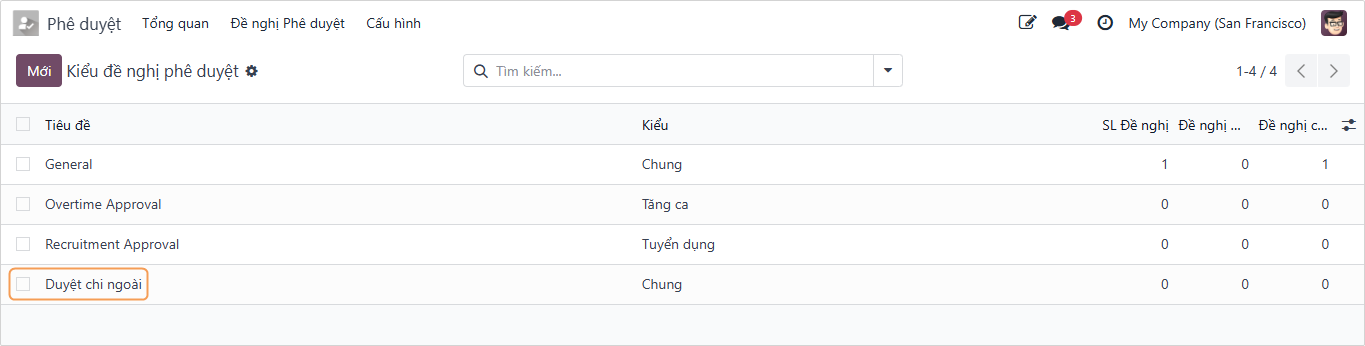
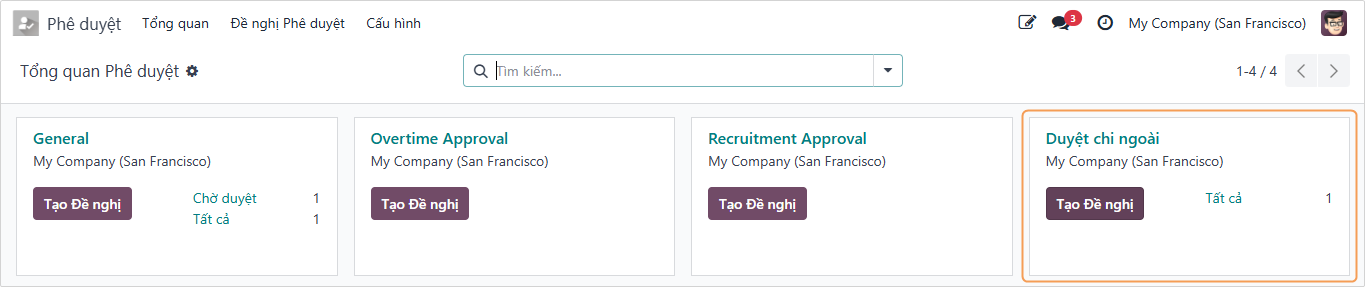
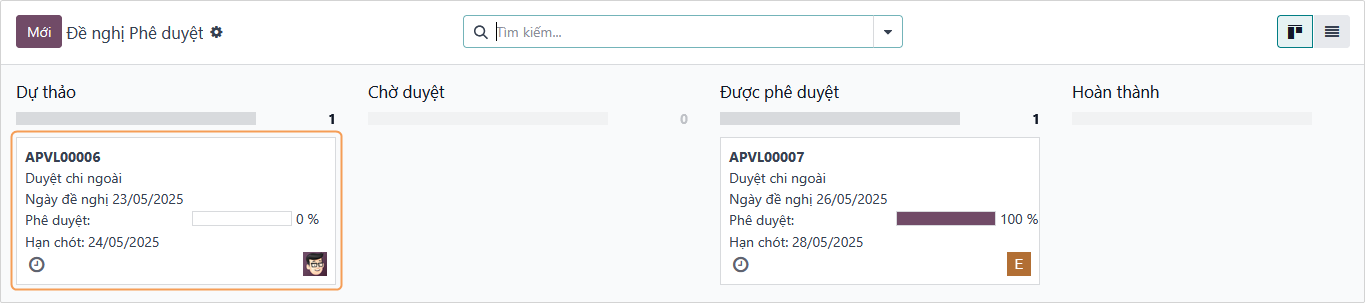
An employee or an employee's manager can adjust the employee's approval request by going to the Approvals app. In the Approvals app overview, select the Approval Request Type, and the list of approval requests for that type will appear; select the approval request you want to adjust.
After adjusting, click Save to complete the adjustment process.

Only requests in Draft state can be adjusted. In case the approval request is not in Draft state, the request needs to be Canceled and set back to Draft state by the owning employee or a user with Administrator rights of the Approvals app before making adjustments.
3.2.4. Resetting Approval Request to Draft
At the approval request interface, click the Cancel button, then click the Back to Draft button.

3.3. Recruitment Request Approval
3.3.1. Recruitment Approval Needs
In reality, recruitment needs may stem from the board of directors (Desire to expand company scale, establish new departments,...) or from the departments needing recruitment themselves (Supplementing manpower for missing job positions,...). This recruitment need can be recorded and executed through the Approvals app, making the recruitment management process clearer and more consistent: one can track and manage the recruitment progress from the moment the need arises, approved by superiors, to when recruitment begins, candidates are found, and successful candidates become company employees.
3.3.2. Setting up Approval Request Type
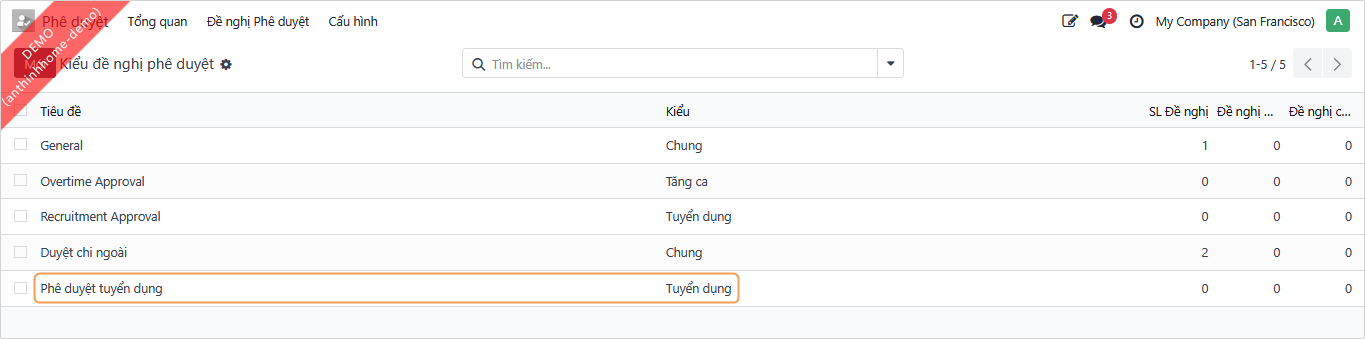
To create an Approval Request Type, the user needs Administrator rights in the Approvals app. Go to Approvals > Configuration > Approval Types.
By default, the Approvals app already suggests a Recruitment Approval Request Type.
In the Recruitment Approval Type form, fill in the necessary information:
- Name: The approval type name should be concise. Example: Recruitment Approval.
- Type: The type of approval request, representing the model where this Approval Request Type will appear.
Example: when selecting the type as Recruitment, this Approval Request Type will appear on the Recruitment menu. The software suggests this is aRecruitmenttype; you should not edit this field. - Approval Process:
- Employee's Manager: Whether this approval request type requires approval participation from the Manager of the employee creating the request.
- No: The approval process does not require the participation of the Employee's Manager.
- Optional: The Employee's Manager will be in the Approvers List but not as a required approver. The recruitment request can still be Completed if the Required Approver has approved and the Minimum Approval count condition is met.
- Required: The Employee's Manager is one of the Required Approvers (regardless of whether they are set up in the Approvers List or not). Before the request is submitted to Approvers, it must be approved by the Manager of the employee creating the request. When Required is selected, the Minimum Approval count is automatically calculated = number of Required Approvers + 1 (The Manager).
- Employee's Manager: Whether this approval request type requires approval participation from the Manager of the employee creating the request.
- Sequential Approval: If checked, Approvers will receive approval requests sequentially from top to bottom in the Approvers List. This helps the approval process run more smoothly, reducing the load for subsequent approvers as well as avoiding dilution or noise in information.
- Estimated Days: The total number of days needed for Approvers to approve the request. In other words, this is the number of days used to calculate the approval deadline for the approval request.
- Minimum Approval: The minimum number of approvals needed for the approval request to be moved to the Approved state. The software will automatically calculate this based on the number of Required Approvers.
The manager needs to be assigned Approval rights to participate in approving Recruitment Requests. Access the Settings app > Manage Users, find the Manager needing permissions to edit the Approval rights set.
-
Approval Process:
- Approvers: The person in charge of approving the Recruitment Request. People set up here will be assigned to approve requests by default.
- Required: Check if the Approval Request Type requires this person to approve mandatorily.
Add a linein this column to set up additional Approvers.

3.3.3. Creating a Recruitment Request
When a Department or Division has a recruitment need for a Job Position, the Department/Division manager, or a person authorized in Recruitment, will create a Recruitment Approval Request.
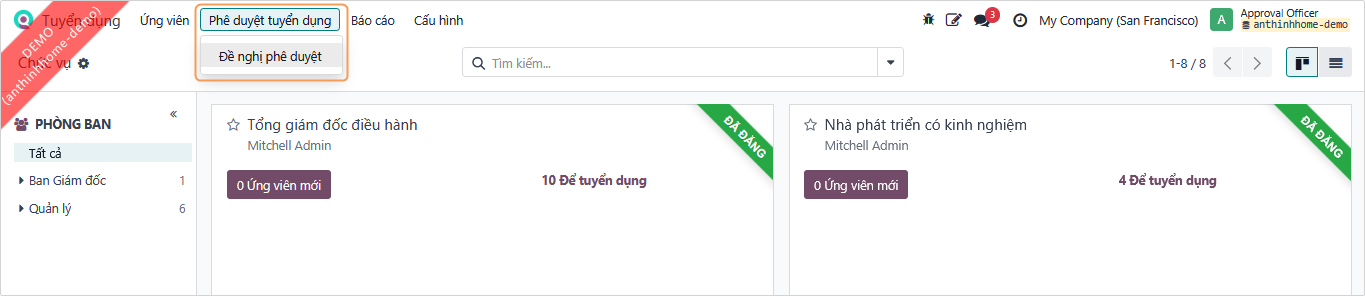
- Method 1: Navigate to the Approvals app > Select the Approval Type as Recruitment Approval > Click the New Request button.

- Method 2: Navigate to the Recruitment app > Select the menu Recruitment Approvals > Approval Requests > Click the New Request button.
To access the Recruitment app, or create a Recruitment Request, users need to be assigned Recruitment rights.
In the Approval Request Type form (depending on how the app is accessed), fill in the necessary information:
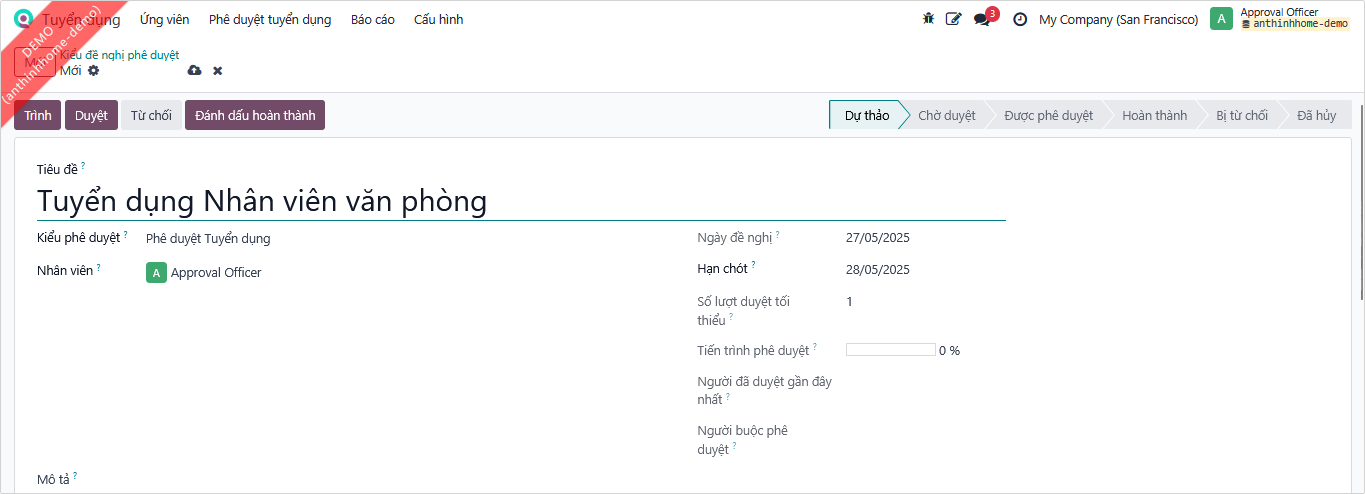
- Subject: The subject needs to clearly state the goal of the recruitment request to help Approvers. Example: Recruitment of Office Staff.
- Company: This field will appear when the system you are using has more than one company.
- Approval Type: Select Recruitment Approval.
- Request Owner: The employee creating the request, automatically filled by the software according to the creator.
- Date: Date of recruitment request creation, the software automatically enters the current date.
- Deadline: The final date by which the approval request needs to be approved. Approvers will rely on this to ensure work progress.
- Minimum Approval: The minimum number of approvals needed for the approval request to be moved to the Approved state, automatically filled by the software from the Approval Request Type. This field helps the request creator be proactive in waiting for approval.
- Approval Status: The progress of the request slip calculated in percentage completion, calculated by the software based on the approvals of the Approvers.
Example: This request slip needs to pass 2 approval steps: the Employee Manager and the Approver. After the Employee Manager approves, the Approval Status is 50%; after the Approver approves, the Approval Status is 100% - ready to be Done. - Last Approved By: Is the person who most recently approved this request; the system will automatically update this person.
- Force Approved By: Here, the software automatically records the person who clicked the Force Approval button to move the request slip to the Approved state.
- Description: Description of the Approval Request slip. You can enter the reason for the recruitment request, the purpose of recruitment...
- RECRUITMENT DETAILS:
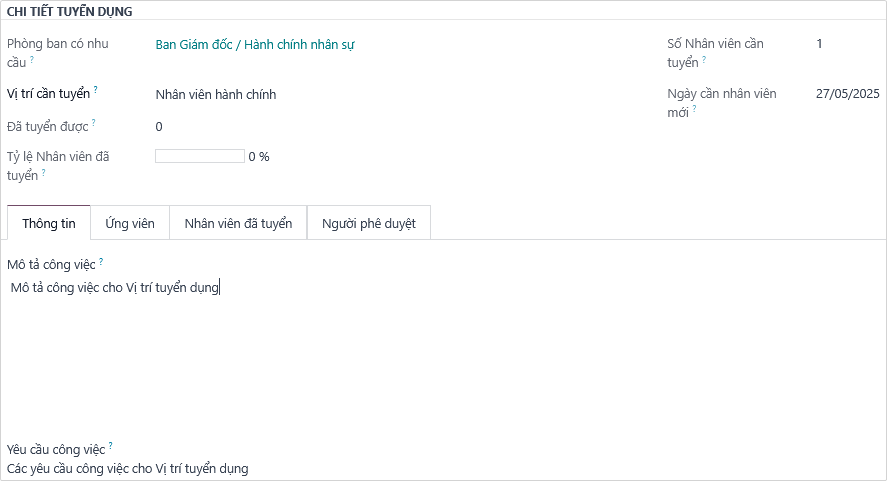
- Department: The department having the job position that needs recruitment. The software automatically suggests based on the creator's department; it can be changed.
- Job Position: The job position that needs recruitment. If this job position has not been set up (new position), a Job Position can be created.
- Hired: After this request slip is approved, the number of candidates hired will be updated here by the software.
- Hired Percentage: The % rate calculated by the software based on the number of employees Hired / Number of Employees to Recruit.
- Expected New Employees: The number of employees expected to be needed for this position.
- Expected Date: The date expected to have the full quantity of new employees according to the recruitment request.
- Information Tab - Job Description and Job Requirements: Detailed description of the work and criteria needed for this job position.
- Candidates Tab: The software automatically lists candidates who have submitted applications for this position.
- Hired Employees Tab: The software updates candidates successfully recruited for this position.
- Approvers Tab: Where the list of approvers and mandatory approval status is listed according to settings on the Approval Request Type, and the most recent date the request was approved by this person.
- Proceed to Save and click the Submit button to transfer to the next approver.
3.4. Overtime Request Approval
In case it is necessary to ensure production and business progress or handle urgent work, employees can create an Overtime Request on the system with full information:
- Overtime date and time.
- Specific work content.
- Overtime duration.
- Additional notes (If any).
The approval process is carried out entirely on the Odoo software helping to:
- Submit to management level for quick, transparent approval.
- Ensure every overtime request has official confirmation.
- Keep a full trail serving for:
- Overtime pay calculation.
- Overtime management.
- Periodic statistics – reporting. All overtime requests will display on the Approvals Dashboard helping managers grasp the situation and make timely decisions.
3.4.1. Creating an Overtime Request
To create an Overtime Request, employees navigate to the Approvals app > select the Approval Request Type as Overtime Approval > click the New Request button.
In the Overtime Request form, the following information needs to be filled:
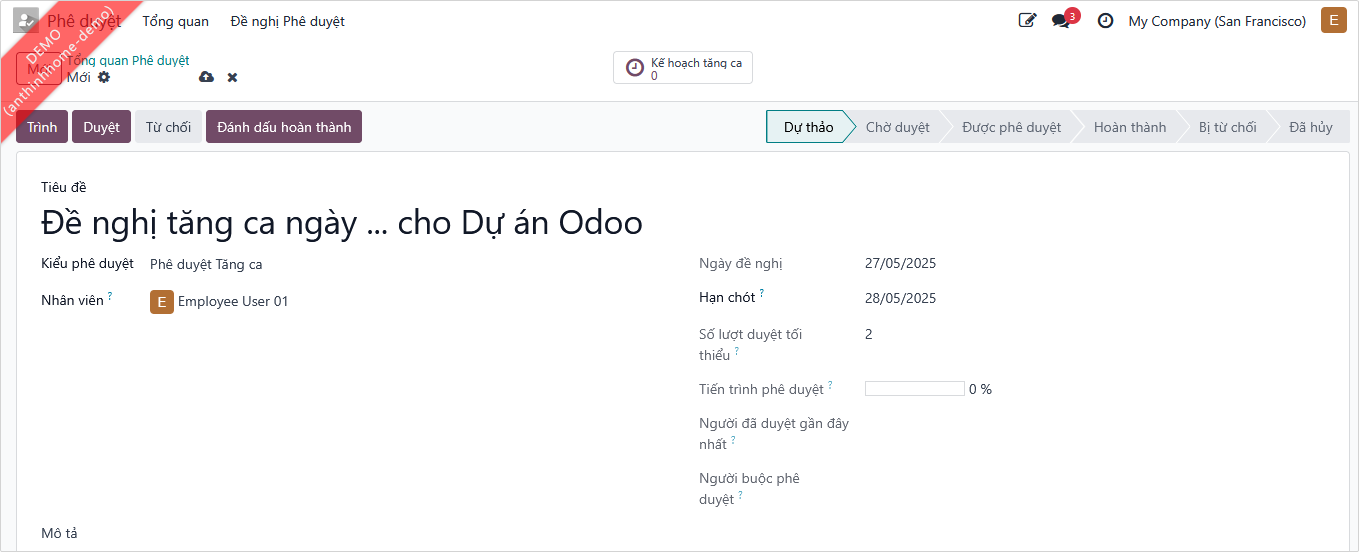
- Subject: The title of the overtime request slip. Needs to clearly state the purpose, reason, and time of overtime to help Approvers easily grasp information when looking at the title. Example: Overtime request on date ... for Odoo Project.
- Approval Type: Select the Overtime Approval already set up.
- Request Owner: The employee creating the request, automatically filled by the software according to the creator. You can create an overtime request for an employee under your management if you are assigned one of the following rights:
- Team Approver right on the Overtime permission group and minimum right is Team Approver on the Approvals permission group.
- Officer right on the Overtime permission group.
- Administrator right on the Overtime permission group.
- Category: The department of the employee creating the request, automatically filled by the software corresponding to the employee requesting overtime.
- Date: Date of creating the overtime request, the software automatically enters the current date.
- Deadline: The final date by which the approval request needs to be approved. Approvers will rely on this to ensure work progress. Simultaneously, the software also creates an activity assignment to remind the person responsible for approving this request.
- Minimum Approval: The minimum number of approvals for the request to be accepted, automatically filled along with the Approval Type. This field helps the request creator be proactive in waiting for approval.
- Approval Status: Calculated automatically by % rate based on the progress of all request approval steps. Example: This request slip needs to pass 2 approval steps: the Manager approves and the CEO approves. After the Manager approves, the Approval Status is 50%; after the CEO approves, the Approval Status is 100% - ready to be Done.
- Approver Status: The status of the request slip for the user currently accessing. There are statuses:
- Not Involved: Case where the user currently accessing does not participate in this request, approval process.
- Draft: You have not confirmed the request slip.
- To Submit/Pending: You are assigned to approve the request slip, however, have not proceeded to approve.
- Approved: You have approved the request slip.
- Refused: The request was not accepted by the manager.
Approver Status only displays for users with minimum rights of Team Approver on the Overtime rights set.
- Last Approved By: The last approver who previously approved the request slip, automatically recorded by the software.
Example: This request slip needs to pass 2 approval steps: Manager approves and CEO. After the Manager approves, the Last Approved By is the Manager, after the CEO approves, the Last Approved By is the CEO. - Force Approved By: Is the person who has the right to overrule previous approvals without going through each established step.
- Description: The requester can enter the reason for overtime, purpose of overtime: overtime for which project, overtime according to department plan...
At the Overtime tab, detailed information of the overtime schedule is displayed; one can enter the overtime schedule for individuals or for the department/division one is in charge of.
Overtime reasons are configured in the Overtime app > Configuration > Overtime Reasons.