5. Time Off Application
TABLE OF CONTENTS
1. Time Off
The Human Resources department of an organization has to monitor many HR activities simultaneously. One of the main tasks HR needs to perform is managing employee leave requests and time off. Leave records must be kept for every employee as they are used in payroll calculations. Leave records will be stored in the same database without opening any other program. From requesting time off to approving leave applications, everything is done through a web platform.
The Odoo Time Off application is the central place for all time-off related information. This application manages requests, balances, allocations, approvals, and reporting.
Users can request time off and view an overview of their requests and time-off balances. Managers can allocate time off to individuals, teams, or the entire company and approve time-off requests.
Detailed reports can be run to see utilized time off (and time-off types), accrual plans can be created, and public holidays can be set.
Please note, only users with specific access rights can view all time-off requests, approve requests, and distribute allocations.
2. Configuration
To configure Time Off types, Accrual Plans, Public Holidays, Working Schedules, navigate to Configuration.
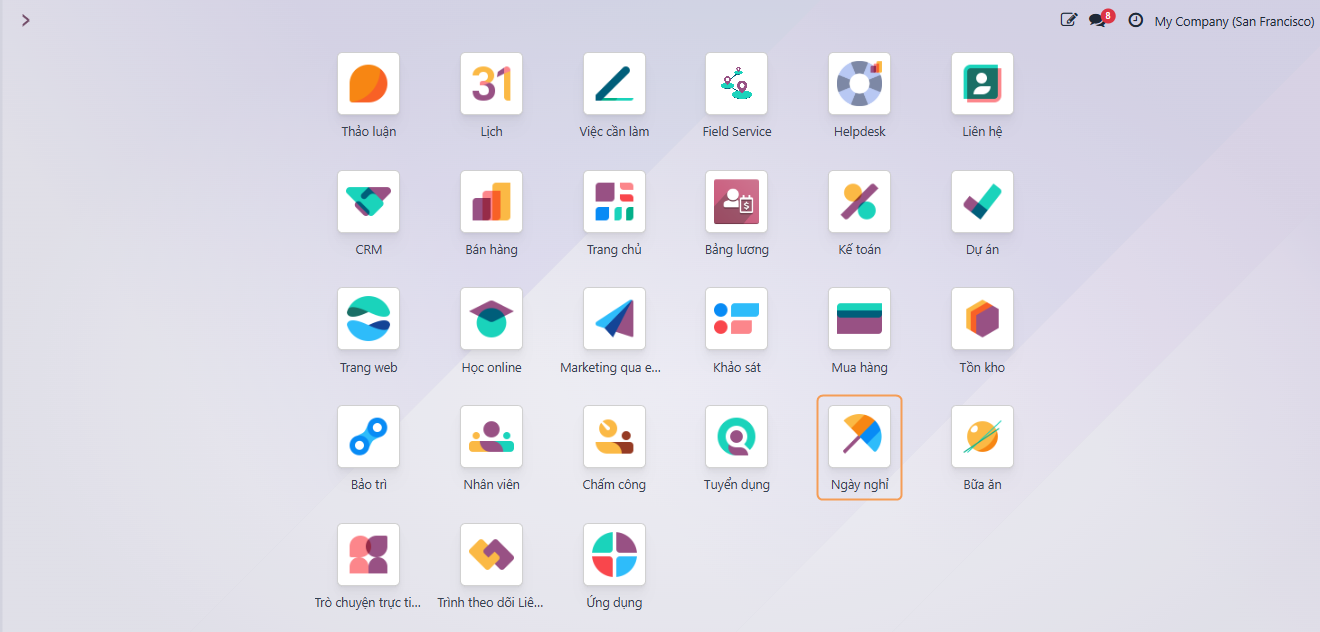
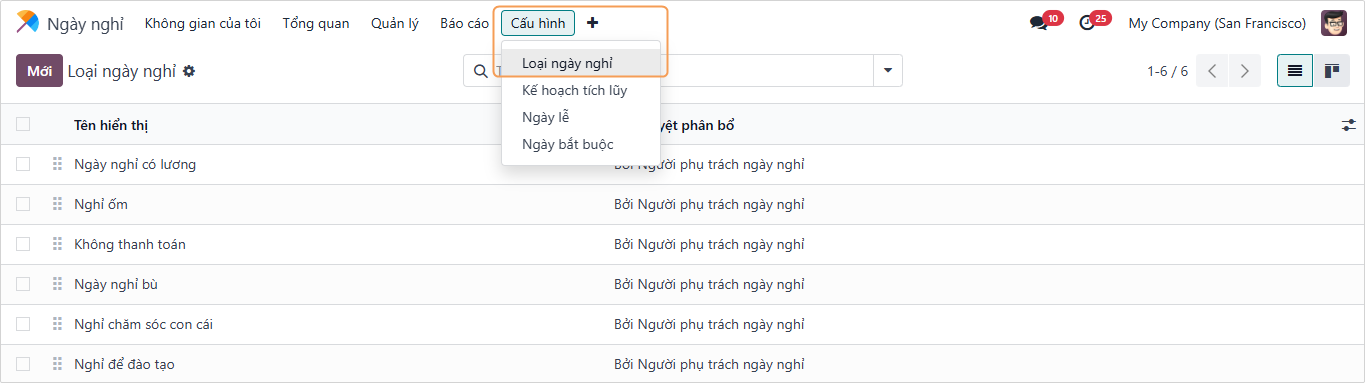 Figure 1
2.1. Time Off Types
Navigate to Configuration ‣ Time Off Types. Time Off Types are the different types of leave that employees can request (e.g., Paid Time Off, Sick Time Off, Unpaid Time Off, etc.).
To create a new Time Off Type, click the New button (Figure 2).
 Figure 2
Enter the Name of the Time Off Type. Then, configure the settings for Time Off Requests, Allocation Requests, Payroll, and Timesheets (Figure 3).
 Figure 3
2.1.1. Time Off Requests
- Approval: Select the type of approval required for this time off type.
- No Validation: The request is automatically approved.
- By Time Off Officer: The request must be approved by the Time Off Officer.
- By Employee's Approver: The request must be approved by the employee's manager (specified in the employee's profile).
- By Employee's Approver and Time Off Officer: The request needs dual approval.
- Responsible Time Off Officer: Select the person responsible for approving this time off type.
- Take Time Off in: Choose the unit for taking leave.
- Day: Leave is calculated by day.
- Half Day: Leave is calculated by half-day.
- Hours: Leave is calculated by hour.
- Deduct Extra Hours: If checked, this time off type can deduct from extra hours worked.
2.1.2. Allocation Requests
- Requires allocation: Select whether employees need to be allocated days for this time off type before they can use it.
- Yes: Allocation is required.
- No Limit: No allocation limit (e.g., Unpaid Leave).
- Employee Requests: Select if employees can request allocations themselves.
- Extra Days Requests Allowed: Employees can request extra days.
- Not Allowed: Employees cannot request allocations.
- Approval: Select who approves the allocation request.
2.1.3. Payroll
- Work Entry Type: Select the work entry type for payroll purposes (e.g., Paid Time Off, Sick Time Off).
2.1.4. Timesheets
- Project: Select the project to which the time off will be logged in timesheets.
- Task: Select the task for the time off entry.
2.2. Accrual Plans
Navigate to Configuration ‣ Accrual Plans. Accrual Plans allow you to automatically allocate time off to employees over time (e.g., 1 day of paid leave per month).
Click New to create a plan (Figure 4).
 Figure 4
Enter the Name and configure the Levels. Click Add a new level to define how time off is accrued (Figure 5).
 Figure 5
- Start after: The accrual starts after a certain period from the employee's start date.
- Rate: The amount of time off accrued.
- Frequency: How often the time off is accrued (Daily, Weekly, Monthly, Yearly).
- Limit to: Maximum amount of accrued time off.
2.3. Public Holidays
Navigate to Configuration ‣ Public Holidays. Define the public holidays for the company. These days will automatically be blocked for time off requests (Figure 6).
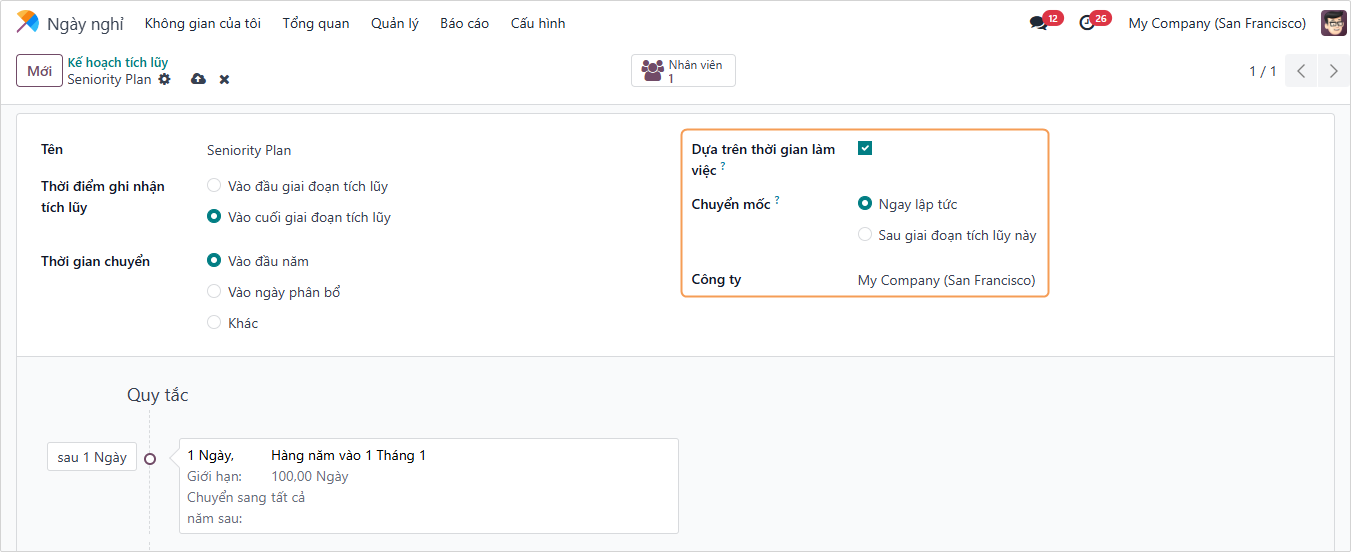 Figure 6
Click New to add a public holiday.
- Name: Name of the holiday.
- Company: Select the company (if multi-company).
- Start Date / End Date: The period of the holiday.
- Working Hours: Apply to specific working schedules.
3. Management
The Management menu is for managers to oversee and approve time off and allocations.
3.1. Time Off
Navigate to Management ‣ Time Off. This view shows all time off requests from employees. Managers can filter by status (To Approve, Approved, Refused) (Figure 7).
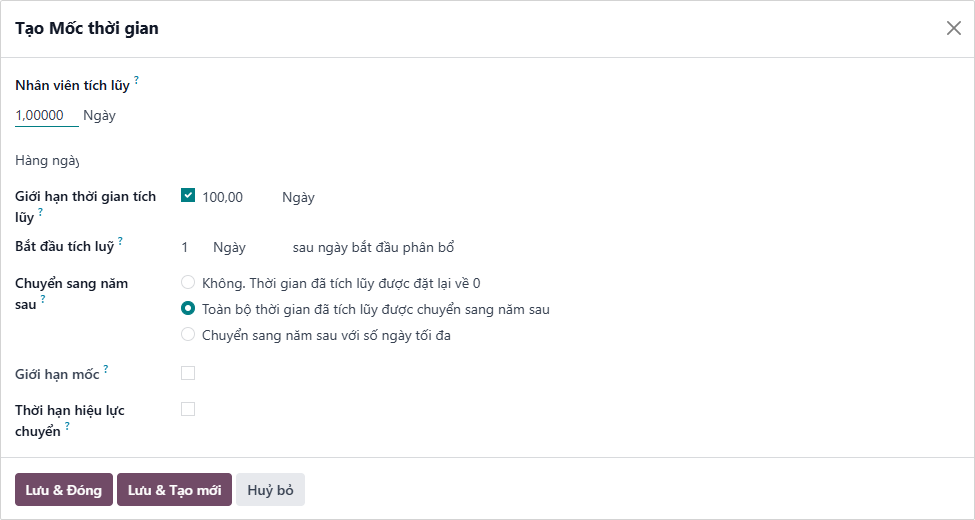 Figure 7
To approve a request, select it and click Approve. To refuse, click Refuse (Figure 8).
 Figure 8
3.2. Allocations
Navigate to Management ‣ Allocations. Similar to Time Off, managers can view and approve allocation requests here (Figure 9).
 Figure 9
4. Reporting
Navigate to Reporting. Odoo provides reports to analyze time off usage.
- by Employee: View time off taken by each employee.
- by Type: View usage by time off type (Figure 10).
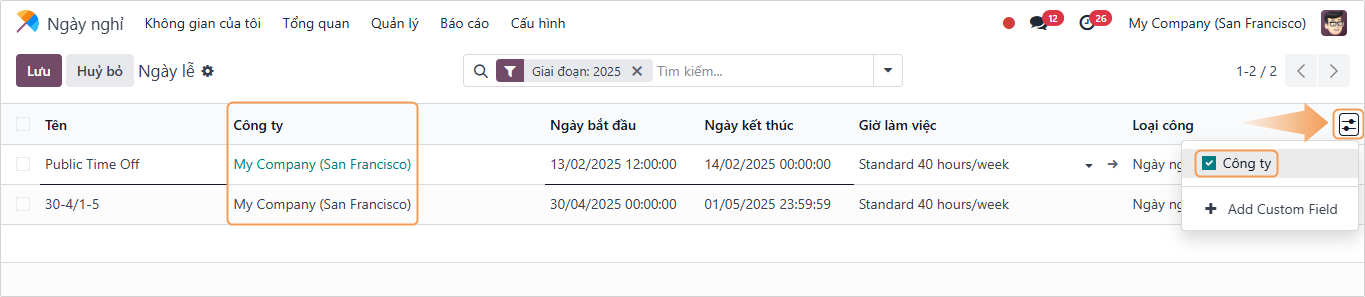 Figure 10
Users can switch between Graph view, Pivot view, and Calendar view.
5. My Time Off
This section is for the logged-in user to manage their own time off.
5.1. Dashboard
Navigate to My Time Off ‣ Dashboard. This provides a calendar view of the user's time off and a summary of their balances on the right side (Figure 11).
 Figure 11
5.2. My Time Off
Navigate to My Time Off ‣ My Time Off. A list view of all time off requests made by the user (Figure 12).
 Figure 12
6. Allocation
6.1. Allocate Time Off
Only users with the appropriate access rights (Officer or Administrator) can create Allocations. To create a new allocation, navigate to the Approvals app ‣ Allocations or Time Off ‣ Management ‣ Allocations.
Click New (Figure 13).
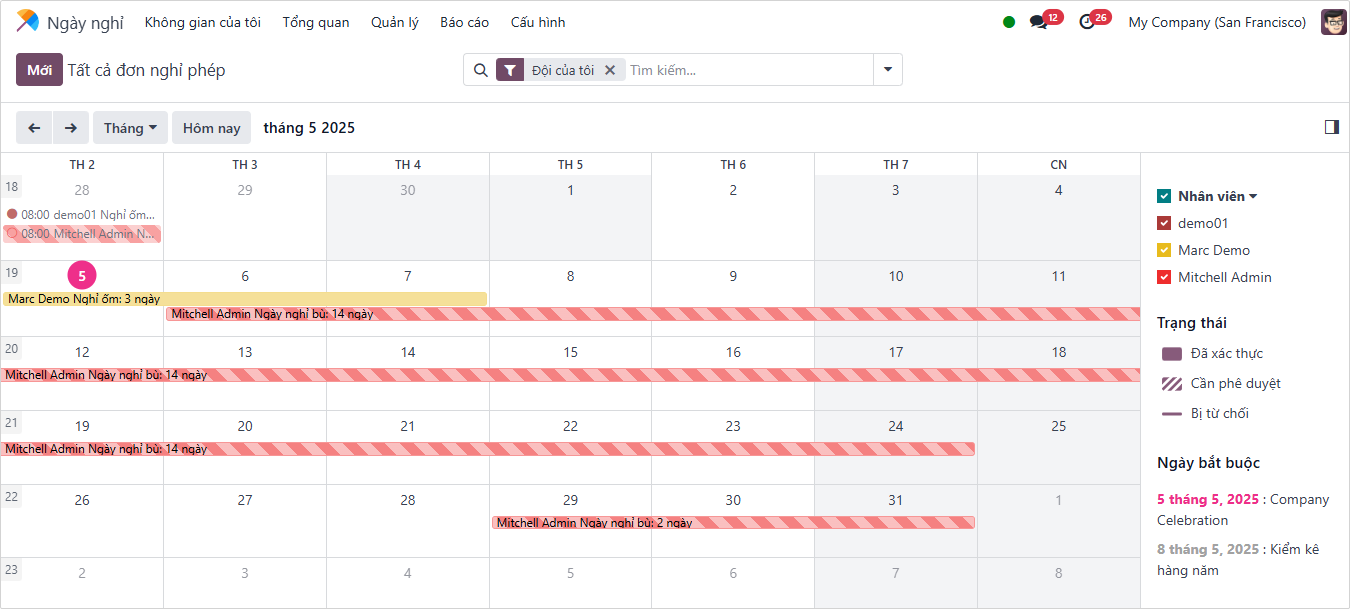 Figure 13
In the allocation form (Figure 14):
- Description: Name of the allocation.
- Time Off Type: Select the type of leave to allocate.
- Allocation Type:
- Regular Allocation: Give a fixed amount of time off.
- Accrual Allocation: Use an Accrual Plan.
- Employees: Select the employees to receive this allocation.
 Figure 14
Click Validate to approve the allocation.
6.2. Request Allocation
Employees can request allocations if the Time Off Type configuration allows it (e.g., requesting compensatory time off).
Navigate to My Time Off ‣ My Allocations (Figure 15).
 Figure 15
When employees have used all their allocated time off or are about to run out, they can request additional allocation.
To create a new allocation request, navigate to the Time Off app ‣ My Time Off ‣ My Allocations ‣ New.
7. Time Off Request
7.1. Method 1
To proceed with registering time off, navigate to the Time Off app > click the New button (Figure 16).
 Figure 16
In the New Time Off form, fill in the following information (Figure 17):
- Time Off Type: Select the type of time off allocated previously.
- Dates: Select the time off period, limited to the allowed Time Off Type.
- Description: Add information such as the reason for time off.
 Figure 17
Click Save & Close to register the time off. To view the leave slip just created, go to the Calendar app on the dashboard. Alternatively, you can view details of the leave slip by accessing Time Off ‣ My Time Off ‣ My Time Off Requests.
7.1. Method 2
Navigate to the top right corner of the screen (system bar), click on the user icon, select My Profile (Figure 18).
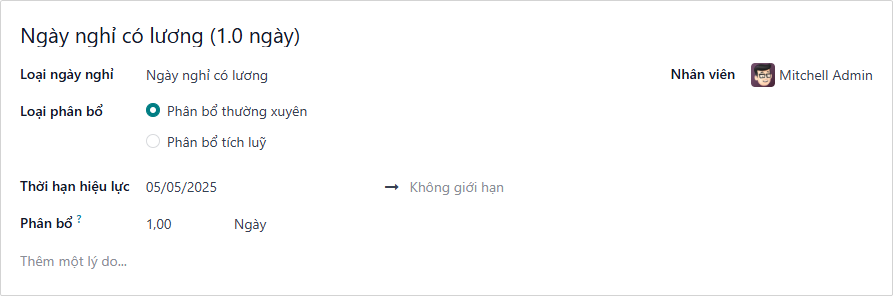 Figure 18
Then select Time Off (Figure 19).
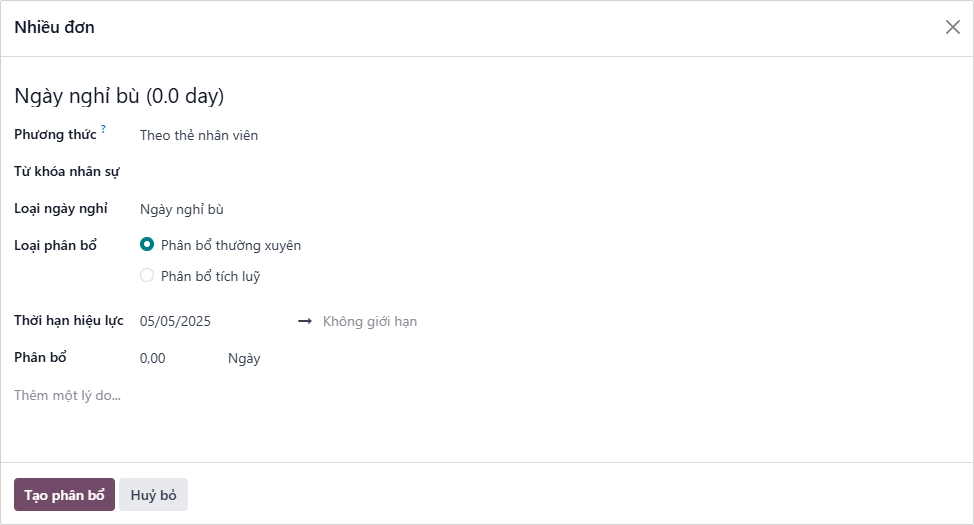 Figure 19