7. Recruitment Application
TABLE OF CONTENTS
- 1. Introduction to the Recruitment Application in Odoo
- 2. The Role of the Recruitment Application in Business
- 3. Steps to Deploy the Recruitment Application in Odoo
- 3.1. Installing Necessary Modules
- 3.2. Building a Standard Recruitment Process (SOP)
- 3.3. Recruitment Settings
- 3.3. Setting up Job Positions
- 3.4. Receiving Applications
- 3.5. Screening and Categorizing Applicants
- 3.6. Organizing Interviews and Assessments
- 3.7. Approving Recruitment Results
- 3.8. Creating Official Employee Profiles
- 3.9. Monitoring and Reporting
- 4. Benefits and Considerations when Deploying
- 5. Integration with Other Operations in Odoo
- 6. Basic Recruitment Process
1. Introduction to the Recruitment Application in Odoo
The Recruitment application in Odoo supports businesses in managing the entire recruitment process, from the moment a hiring need arises, posting job ads, receiving applications, assessing, interviewing, to making hiring decisions and converting candidates into official employees. All data is stored centrally and securely, supporting analysis and evaluation of recruitment efficiency, creating a recruitment talent pool for the enterprise.
Odoo ensures all recruitment candidates are managed scientifically through a chain of pre-configured steps and stages that each candidate will go through. Each stage has specific steps that need to be performed, such as scheduling a phone call, interviewing, or sending an offer letter. This process is called the applicant workflow.
When a candidate applies for a job, an applicant card is automatically created in the Recruitment app of Odoo for that specific job position. As the candidate proceeds through the recruitment process, the recruitment team will move their card from one stage to the next.
2. The Role of the Recruitment Application in Business
- Standardize Recruitment Process: Unify steps in the recruitment process, making it easy to train and control.
- Optimize Resources: Reduce costs, time, and effort for the HR department.
- Support Decision Making: Recruitment data helps analyze candidate sources and the effectiveness of each recruitment channel.
- Enhance Candidate Experience: Transparent process, professional communication.
- Internal Integration: Close connection between related departments such as HR, Sales, and the Board of Directors.
3. Steps to Deploy the Recruitment Application in Odoo
3.1. Installing Necessary Modules
- Recruitment: Manages the recruitment process.
- Employees: Manages personnel after hiring.
- Survey: Creates and sends interview surveys to candidates.
- Approvals: Confirms recruitment needs, cost/salary proposals.
- Website: Displays job postings on the company website.
- Documents (optional): Stores candidate profiles.
3.2. Building a Standard Recruitment Process (SOP)
- Identify key processing steps: Recruitment Proposal → Need Approval → Job Posting → Receiving Applicant Information → Interviewing → Assessment → Approval → Signing Contract.
- Assign clear responsibilities for each role: HR, Manager, Director.
3.3. Recruitment Settings
- Go to Recruitment > Configuration > Settings.

- Online Posting: Allows posting job ads on the website.
The Online Posting feature is only available if the Website app is also installed.
- Process: Allows sending surveys to candidates during the recruitment process.
You need to install the Survey module to activate this.
- CV Display: Allows displaying CVs on the application profile.
3.3. Setting up Job Positions
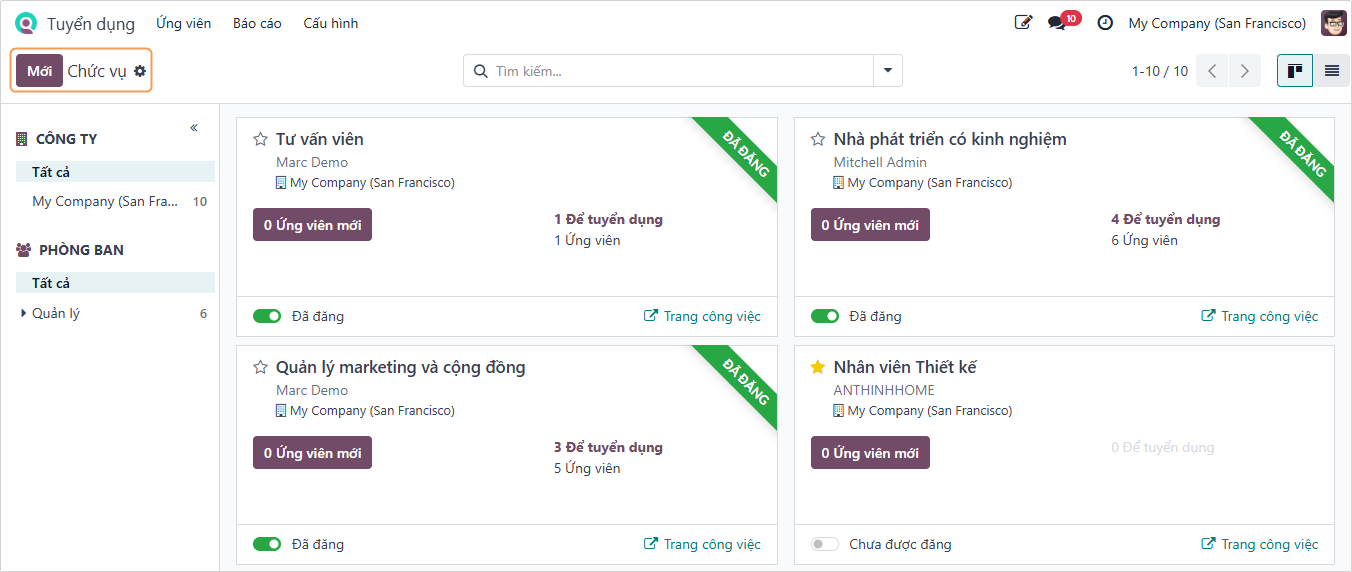
- When entering the Recruitment app, the recruitment dashboard will display all positions that the company has posted or is posting, arranged by each department.
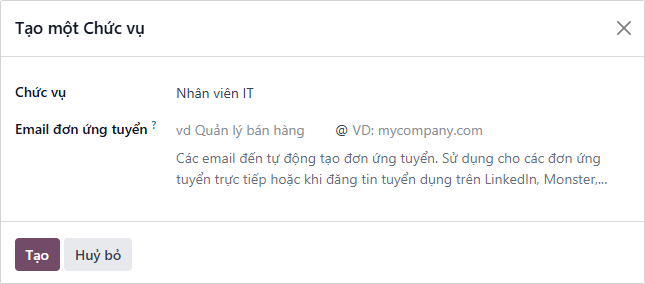
- To create a new position to recruit, click the New button.
- In the Create a Job Position form, fill in the job position information, the email to receive applications from candidates, and click the Create button.
- The recruitment board will have the newly created position; click the 3 dots (⋮) and select Configuration to add necessary information.
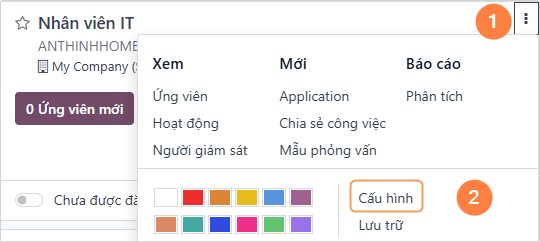
- In the job position configuration, fill in all information related to that position.
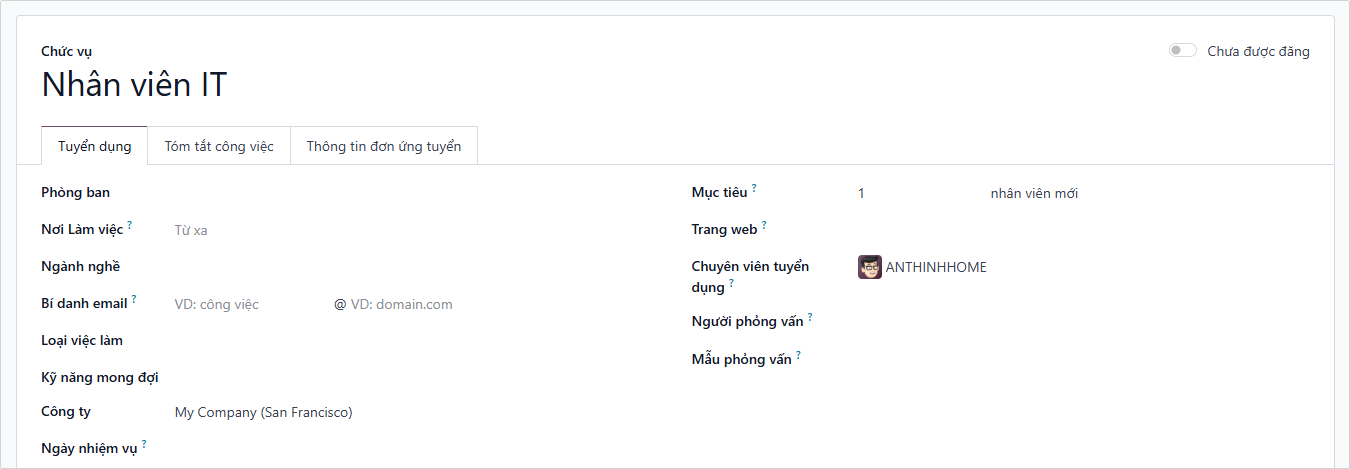
Interview Form is created beforehand in the Survey app with the type Recruitment.
- The
Recruitmenttab contains the recruitment process for that position.
3.4. Receiving Applications
- When a candidate submits an application, either via online application or via email specifying the job position, an applicant card will automatically be created in the Recruitment application.
- However, in some cases, candidates may need to be manually created in the database. This might be necessary if, for example, a company accepts paper job applications via mail or meets potential candidates at an in-person job fair.
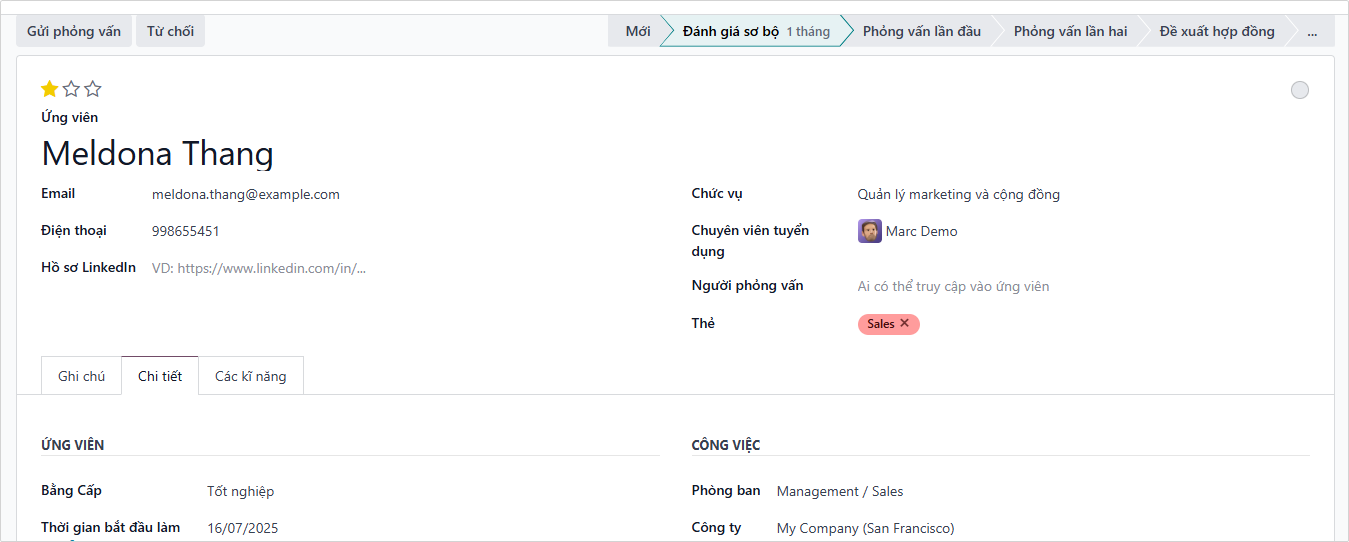
- To view current applicants, navigate to the Recruitment app, then click on the card for the desired job position. Doing so will display the Applications page, showing all applicants for that specific role, in the default Kanban view, organized by stage.
On the Job Position page, click the Quick add button, represented by a small ➕ (Plus sign) icon in the top right corner of each stage to quickly add a new applicant to that stage. Enter the following information into the card:
- Applicant: Full name of the applicant.
- Subject: The position applying for.

After entering the information, click Add. The applicant will appear in the list, and a new empty applicant card will appear. If desired, after entering the Applicant Name on the appearing Kanban card, click Edit, and the detailed applicant form will open. When performing quick add, clicking outside the empty card or clicking the Trash icon removes the applicant.
3.5. Screening and Categorizing Applicants
- View profiles by stage (kanban): New → Initial Qualification → First Interview → Second Interview → Contract Proposal → Contract Signed.
- For each applicant profile, you can add notes, job details, skills, attach files, and communication history.
3.6. Organizing Interviews and Assessments
- Create appointments with candidates. Candidate appointments can be easily tracked within each applicant profile.

- Send online interview tests (If a Recruitment Survey was created previously from the Survey app).
- Receive evaluations from interviewers, synthesize results.
3.7. Approving Recruitment Results
- Send requests for approval of salary, costs, and quantity needed via the Approvals module.
- Submit for electronic signature if Sign is integrated.
3.8. Creating Official Employee Profiles
- Convert the candidate into an employee (Convert to Employee).
- Add personal information, contract, internal account, department, manager.
- Trigger the onboarding process if available.
3.9. Monitoring and Reporting
- Report by: time to hire, candidate source, interview performance, hire rate, refusal reasons.
- Charts and summary tables help HR analyze the effectiveness of the recruitment campaign.
4. Benefits and Considerations when Deploying
| Benefits | Considerations |
|---|---|
| Automation: Reduces time for data entry and manual profile processing. | Standardize Input Data: JDs, emails, and tests must be built in advance. |
| Increase Accuracy: Avoid lost profiles and information errors. | Internal Training: Ensure HR and managers understand their roles in the system. |
| System Synchronization: Seamless information flow from recruitment to personnel management. | Check Process Suitability: Each job position needs to check if the actual recruitment process is appropriate. |
| Clear Permissions: Ensure candidate information security. | Candidate Data Security: Limit access rights, encrypt sensitive data if necessary. |
| Performance Analysis: Easily identify the best recruitment channels and departments with high demand. |
5. Integration with Other Operations in Odoo
| Operation | Integration Purpose |
|---|---|
| Employees | Convert applicant data to employee data |
| Approvals | Approve recruitment proposals, salaries |
| Survey | Conduct surveys, competency assessments |
| Website | Post public job listings |
| Payroll | Calculate payroll for new personnel |
| Documents | Store profiles, contracts, ID cards, degrees |
| Sign | Sign electronic recruitment contracts (Odoo Enterprise) |
6. Basic Recruitment Process
Detailed Steps:
- The Department Head sends a recruitment request via Approvals.
- HR receives the request, creates a Job Position.
- The recruitment ad appears on the website and receives applicant profiles.
- HR screens profiles according to requirements.
- Organize interviews and send surveys (if any).
- Gather evaluations, submit for approval.
- After approval, HR creates a new employee, starting the onboarding process.